Pages

Monday, September 21, 2015

Apples, Apples, Apples!


It's that time of year again. The evenings starts to cool off a bit, sometimes we need a light jacket, the hint of color changing in the leaves, kids are back in school, and even football.

My parents live in my grandparents old home in a very small community in northern Utah. My grandpa was a dentist by occupation and a farmer by hobby. He raised a couple hundred chickens every year. I remember helping him gather eggs. One time I went without him and got pecked by a chicken, I still carry the scar, suburb girl wanna be country girl. My grandpa had about an acre of land and he was always working in his garden. He had raspberries and potatoes (I have never eaten as good of red potatoes as the ones that grew in grandpa's yard), corn, tomatoes and of course, lots and lots of apple trees.

After my grandparents passed, my parents decided to leave Southern California and buy my grandparents home. My parents do not have the same love of gardening. In fact, they hate it. We often joke that Grandpa is probably rolling over in his grave at the condition of his garden. The apple trees are still there though. They haven't been pruned in over 15 years, but they are still going strong.  The last several years I have been driving north to relieve the poor trees of their burden. I am not sure of the varieties of apples that are growing, one for sure is a macintosh. Maybe someday I will bring the apples to my local extention office and find out for sure. Some of the trees have just grown on their own, maybe a mixture of types of trees. Their location suggests Grandpa didn't plant them. Anyway, as such, I get a nice variety of apples every year! Red and green and yellow and speckled and everything in between. I love it! So every fall I bring a car load of apples home and process them to my hearts content!

Applesauce is the basic stand-by for bushels of apples. It is pretty easy to make. But I discovered something even more fun to do with the apples. I call it liquid gold! Apple cider. My friend corrected me and told me I was not making cider. I don't know, I am self taught on canning and gardening and the like. Regardless, this is how I do it:

Since I have access to lots of different varieties of apples, I like to use this variety to hopefully give my cider/applesauce a unique taste.

I fill a large stock pot about 1/3 full of water and start the heat. While the water is heating up I start adding apples. If you have made applesauce before, this is familiar to you. Cut up your apples, stems, seeds, skin and all and dump them in the pot. If there are flaws, bug holes, etc, be sure and cut the bad part away until the flesh is totally free of imperfections. I usually sort through and get the worst looking apples and use them first so they don't spoil the good apples. I am mostly careful when I pick, but in trees that are left to their own devises, there are going to be imperfections. Sometimes I will cut open an apple and find the entire inside rotted out. Dump the whole apple, its not worth it.

So get your pot full to the top of apples and water. At this point I add sugar and sometimes cinnamon to my pot. By the way, this is a mess and really wrecks havoc on your stove. Be prepared to spend significant time cleaning your stovetop when you are done. Once the apples start to soften start tasting the liquid to see if it needs more sugar or cinnamon if you choose. Simmer the apples until they are nice and soft.

Once the apples are nice and soft, strain the apples from the juice. I scoop, then set them in a pasta strainer. I dump the liquid back in the pot and put the soft apples through the food mill.  To make the apple sauce you need to use some sort of food mill. I use a Norpro Sauce Master. They cost around $65. Dump the apples into the top, crank the handle and the sauce comes out the bottom. Oh, be sure and put a large bowl under it to catch the applesauce. You also need a second bowl to catch all the apple waste. That's the stem and skin and seeds, etc. Sometimes I will take that bowl and run it through a second time to squeeze the last bit of pulp out of the apples.

So now you have a large bowl of applesauce and a pot of liquid leftover from making the applesauce.


I either can the applesauce or make it into apple butter. I'm not going to get into the specifics of canning applesauce, that can be found anywhere.


To get the cider, strain the leftover liquid from simmering the apples. I strain it twice, once through a wide strainer, then a second time through a more fine strainer. I like bit of pulp in the cider, to me that is one of the differences between apple cider and apple juice. But there will be seeds and bits of this and that in the liquid, you want those out. Go ahead and taste the cider. See if you would like it sweeter or not. One year I added too much sugar and I needed to add a little water to cut down the sweet. Of course, that dilutes the apple flavor, so try to not make that mistake. Here I usually like to pour a little in a tea cup and sit down and relax for a few minutes. Taste the cider, enjoy fall.

I think its a bit of heaven on earth. Now I have several dozen jars of cider that I will bring up in the cold months and sip on to warm up after running errand in the snow. I'm a Southern California girl and I think I have been forever softened and ill equipped for cold weather. One of my favorite things to do though is to sit and look out my large windows, sipping hot cider and watching the snow fall. Just don't make me go in it.  

With my apples, I also make apple butter. For that one I prefer the crockpot method. I don't really use a recipe. I fill my largest crockpot up with fresh applesauce. I add cinnamon and nutmeg, cloves, and ginger. And of course sugar. Just taste it. Then turn the crockpot on low and stir it every couple of hours. I set chopsticks across the top so the lid isnt on all the way. That wasy the fluid can boil off. Last year I let it simmer for 2 days, but 24 hours should be fine too. Just stir it, taste it, adjust the seasonings, etc. It is done when it has developed pectin. You can tell this if it sticks to a spoon and holds its shape. There are several recipes for apple butter. I just like this one because it can do its things without me sitting next to a stove stirring it for an hour or more. It should also be fairly dark. I call it fall in a bottle.

I also dry my apple slices which is a nice snack during the summer.

A few times I have even made Apple Pie in a Jar. Here is the recipe:


Thursday, July 2, 2015

Independence Day!


I love the ombre look! It's so fun. It reminds me of watercolor, even though I was never very good at that particular art form. What I am really good at is baking. I like to express my artistic side with my baked goods and sewing projects as well. So I decided to have fun with the ombre look and created this cute patriotic cake.

 
It is really easy to put together. I made 2 batches of white cake. You can find any old recipe or use a box mix if that is what you prefer.  For this particular cake I baked one red, one white and one blue. I would recommend making one batch with two white cakes and a second batch with half the batter colored red and the other half blue.  (Freeze the single white cake for another use). I have learned a really cool trick for getting your cake layers to be even. Use a simple kitchen scale. For the white cakes, grease and flour and parchment both cake pans. Pour your batter into both cake pans (by the way, I used 9"). Then scoop a little at a time to make both cake pans with batter weigh the same. With the two colored cake, I did not grease my pans yet, instead I just used the pans to weigh them on the scale to get them both even, then once they were, I poured them in different bowls then added the dye. From there, grease and flour, etc your pans and add the colored cake batter. It's really not good for cake to be over-mixed, so just try to not over do it.
 
Once your cakes are baked and cooled and ready for decorating, then prepare your frosting. I use a normal buttercream. I filled the layers with white buttercream and crumb-coated the cake. Once you are ready to decorate, keep a third of the buttercream white, then a third red and a third blue. Put your cake on a turntable. Using an offset spatula, spread the upper third with red, then the middle with white and the bottom with blue. Sorry I didn't get any pictures of this process. I used my small spatula in the beginning, then once I had the colors about where they needed to be I used the larger offset spatula to mesh the colors together. The trick here; I get a large juice pitcher and fill it with hot water. I keep a clean dish towel close by as well. I stick the spatula in the water and give it a second to soak, then pull it out and dry it off. Then use the long flat bottom to smooth out the colors. Don't be too particular. Its ombre, it's supposed to kinda bleed into the other colors. I was surprised at how quickly it came together.
 
It may seem like a lot of work to make the 3 colors of frosting as well as the cake, but the reaction you get when the cake is cut makes it all worth it!  I hope I have explained this well enough. I am a new blogger, have patience with me! Happy Independence Day!!! I love America!


Thursday, October 23, 2014

Missionary Advent Calendar

My son is serving a full time LDS mission in Lima Peru.  Wow I sure miss that boy.  Anyhow, in order to have a package arrive in time for Christmas, I need to get it mailed before Halloween.  Yikes.  I found a cute idea here. I liked how with some of hers she used quotes or words from Christmas songs.  So I decided to put my own spin on it.  Most of my graphics came from here and some I just copied and pasted from other places.  I like how on the two by two site she had different treats for different days.  I am running out of time so I just got a mixed bag of candy.  I also wanted to have enough for him to share with his companion/roommates.  Often they have 4 to an apartment so I put the treats in multiples of four. Here is a picture of the finished project:

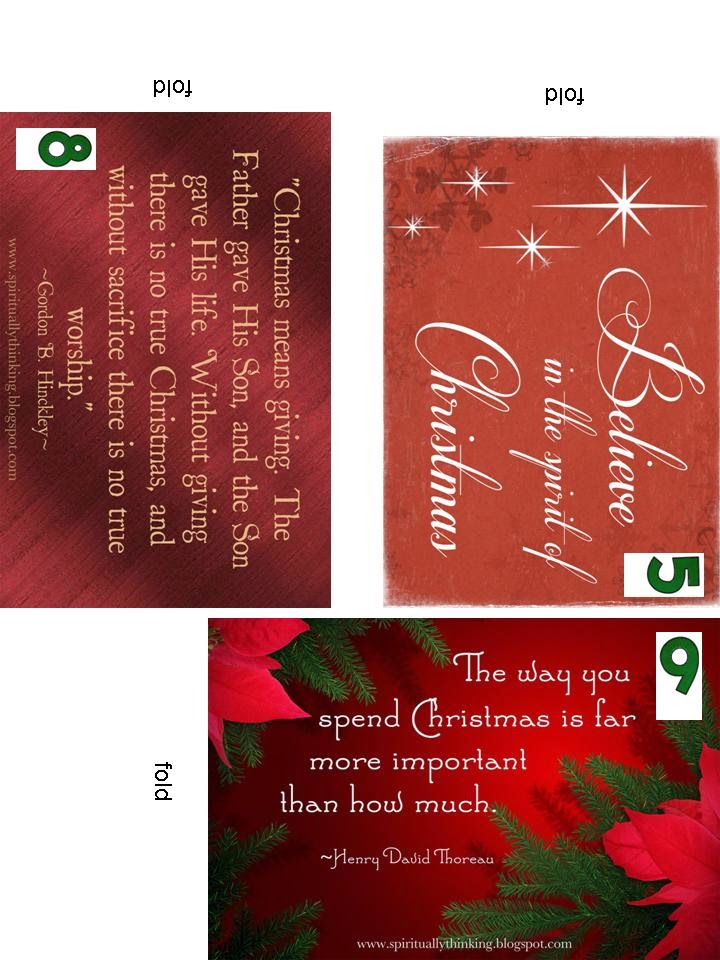
Once I finished with the graphics part, I printed the graphics on cardstock. Then I cut them out. Be sure and leave an edge on the side that you want to be the top so you can fold it down and have something to staple it on with.
On the file with the graphics I typed a small "fold" on the edge that should be folded so it will be easier to remember to not cut that area.  If you happen to cut it, no worries, either just staple it on without a fold on the paper or print out another page. Put the treats in cellophane bags and fold the cellophane top down. Then staple the graphics on and it is ready to go.  My son's birthday is in December, so I also included a little note on the back of the one that he will open on his birthday. I guess it would be fun to randomly hand write a few little love notes.
 
I saved the graphics as a jpeg, so hopefully it will open up and print nicely for you.  If you have any problems, send me an email.  Enjoy your phone call!


Tuesday, October 21, 2014

Adaptive Star Axiom Improv


I thought it would be fitting that the first post I make in my new blog is related to my daughter, Lynsie.  She has Down Syndrome.  She is now 12 years old, but I think developmentally more like 2.  Anyhow, we love to go places as a family, but Lynsie can be difficult.  She is very stubborn, likes to run, has no concept of danger, and can sometimes be downright disagreeable.  This year I started working with my insurance company in order to get a special needs stroller for her. It finally arrived a week ago!  I spent a couple of months looking at the different options out there and decided to go with the Adaptive Star Axiom Improv. Check it out here.

I also considered the Convaid. There are pros and cons with each. The Convaid looks more like a wheelchair, the Axiom looks like a jogging stroller. The Convaid is smaller and more portable.  The Axiom is quite big.
I drive a Yukon and needed to remove the front tire to get it in. Probably if we go somewhere and need to use our trunk space we (meaning Hubby) will need to strap it to the roof. Hum. I think I can break it down smaller than this.  The back tires come off and there are some straps that loosen so it will lie flatter.

The Axiom comes with a canopy and places to store things.  The Convaid does not.  The man at the wheelchair shop told me usually people just put a backpack on the back of the Convaid. The Axiom has a canvas bag on the bottom as well as a little zipper pocket near the top handy for a phone and keys as well as pockets that hold water bottles or drinks.  Funny thing is, the insurance companies start acting real funny if you want a canopy/storage, etc.  They don't think they should have to provide a stroller.  I can see where they are coming from, but really, I would much rather my 12 year old be able to walk as long as we can.  And not throw fits. And not charge into streets. So if you happen to be trying to get your insurance to help you get one for your special needs child, it needs to be called an Indoor/Outdoor Mobility Push Chair.  Ok, whatever floats your boat. If you want a canopy or storage holder for the Convaid, it is out of pocket. Yikes. These puppies are not cheap.  The Axiom is around $1500 and the Convaid is around $2500.  My insurance covers 90%, which is pretty good. Still, another pro for the Axiom.  Less out of pocket.

Anyhow, I digress. So far I like the Axiom pretty well.  The front tire is fixed which is good and bad.  I kinda have to tilt it to turn it. On bumpy surfaces the fixed front tire is great. The Convaid swivels nicely and is very smooth.  

You might be wondering why I went with the Axiom.  There seems to be more pros for the Convaid. First, we live in Utah. A lot of what people do here for entertainment is outdoors. I was worried about the smaller wheels on the Convaid. If I lived in more of a city atmosphere, I would probably go with the Convaid.  Usually if we are going to the mall, my daughter can walk that long without being a problem. Also, my daughter is pretty mobile, she just sometimes decides she is done and won't walk anymore and wants someone to carry her. The Convaid would be good for you if your child has more mobility demands.

The Axiom is also pretty tall.  I can't see the front tire from the back of the stroller. Here is a picture of my son with the stroller, he is about 5'7.


A quick story that prompted us to pursue getting a special needs stroller.  We took the family to Moab over spring break a year ago.  While walking down main street, Lynsie decided she was done and went charging full speed into the street.  We all screamed and ran after her.  Good thing traffic was light, it might have been bad.  The next day we were in Arches National Park. We couldn't keep her with us and we were not able to hike to see Delicate Arch.  Then at Canyonlands she kept wanting to walk right up to the precipice and look down.  Bad idea.  We drove all over town to try and purchase a little umbrella stroller.  I think we have bought about 5 of those dumb things over the years. We decided it was time to just get a stroller that could handle her growing body and special needs. 
 
If anyone has additional questions, respond to the post and I will try to answer your questions.  Thanks!